Steps to create a self-signed certificate and configure Custom Identity and Custom Trust with Weblogic Server using Keytool
Below are the steps to create a self signed certificate :

Step 1 . Navigate to your Domain Location and run the command SetDomainEnv.cmd
Then we have to run the command to create the identity.jks file which we have to use for SSL
keytool -genkey -alias my
key -keyalg RSA -keysize 1024 -validity 365 -keypass weblogic1 -keystore identity.jks -storepass weblogic2
This command will create a Identity keystore which will have a private key and the public key pair.
geyken -is the parameter for creating a pair of key (ie Public and Private Key)
-keyalg is the algorithm on which the key are created
-Keysize is the size of the certificate ie 512,1024 etc
-keypass - is the password for the Private key
-Keystore -is the name of the keystore we are going to create
-Storepass - is the password for the keystore
List of keytool commands which are changed in java 1.6 :
-export, renamed to -exportcert
-genkey, renamed to -genkeypair
-import, renamed to -importcert
All previous commands are still supported in this release ( keytool in java 1.6 ) and will continue to be supported in future releases.
Once you execute this command the identity.jks file will be created
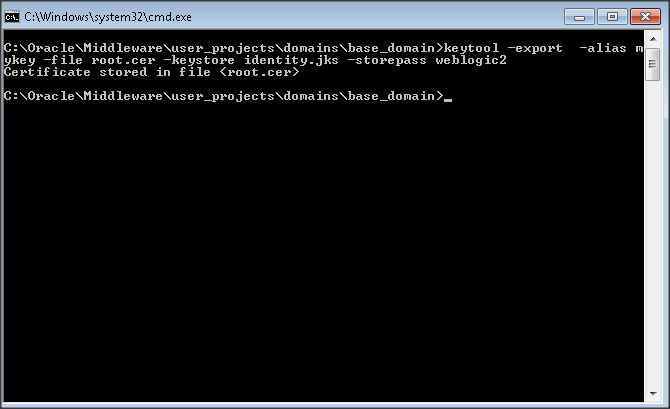
Now we have to Extract the certificate from the identity.jks file to a root.cer file by using the following commnad
keytool -export -alias mykey -file root.cer -keystore identity.jks -storepass weblogic2
You will get the root.cer file in your Domain Location
keytool -export -alias mykey -file root.cer -keystore identity.jks -storepass weblogic2
You will get the root.cer file in your Domain Location


Now we have to import the root.cer file in the New keystore ie:trust.jks
by using the following command:
keytool -import -alias mykey -file root.cer -keystore trust.jks -storepass weblogic2
Once we run the above commad we will get a keystore trust.jks created.
We will copy all the Three files to the Domain Loaction of the Weblogic
ie:C:\Oracle\Middleware\user_projects\domains\base_domain
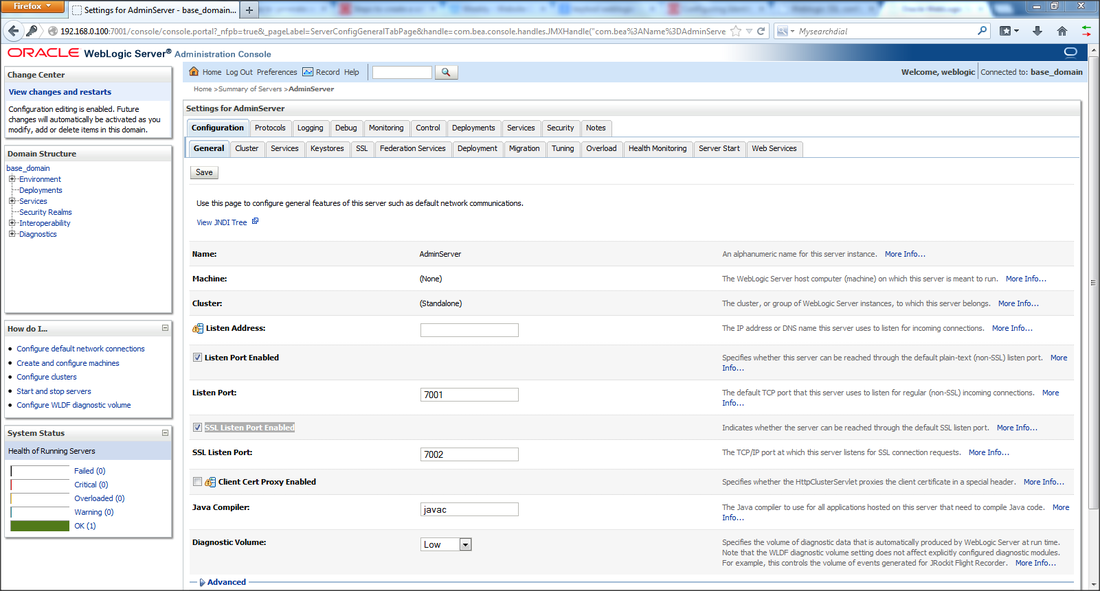
Now start your Weblogic Admin Server and Navigate to the
Login to Weblogic Admin console --> Environment --> Servers --> < server_name_where_ssl_has_to_be_configured > --> Configuration -> General --> SSL Listen Port Enabled ( Check )
Login to Weblogic Admin console --> Environment --> Servers --> < server_name_where_ssl_has_to_be_configured > --> Configuration -> General --> SSL Listen Port Enabled ( Check )
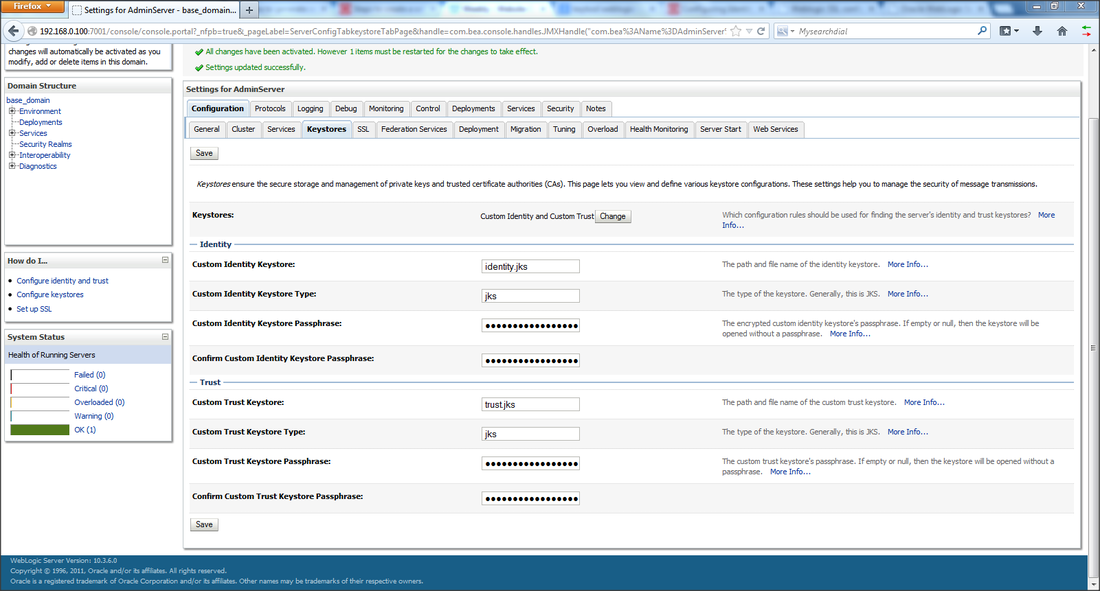
Navigate to the Keystore Tab and change the Keystores and select " Custom Identity and Custom Trust "
and then fill all the information .
Identity---
Custom Identity Keystore : < location_of_identity_keystore_that_you_have_created>
NOTE : By default WLS will look for this keystore file in domain_home location.
Custom Identity Keystore Type : jks
Custom Identity Keystore Passphrase: < This_would_be_your_storepass >
---Trust---
Custom Trust Keystore : < location_of_trust_keystore_that_you_have_created>
NOTE : By default WLS will look for this keystore file in domain_home location.
Custom Trust Keystore Type : jks
Custom Trust Keystore Passphrase: < This_would_be_your_storepass >
Save the changes made
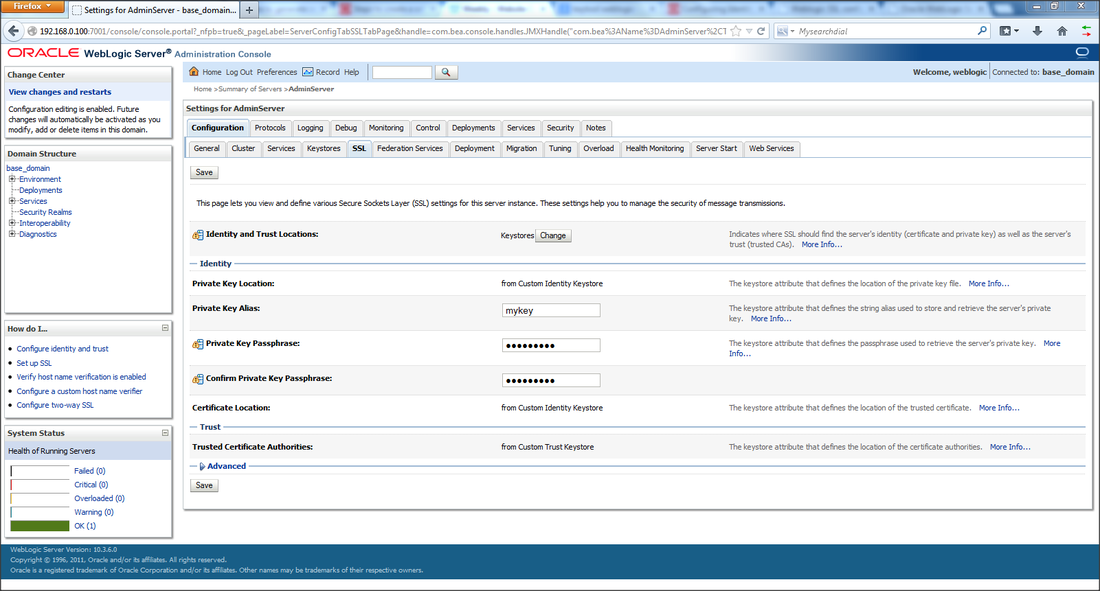
Now move on to the SSL tab
Private Key Alias: < This_would_be_your_certificate_alias >
Private Key Passphrase: < This_would_be_your_keypass
Private Key Alias: < This_would_be_your_certificate_alias >
Private Key Passphrase: < This_would_be_your_keypass
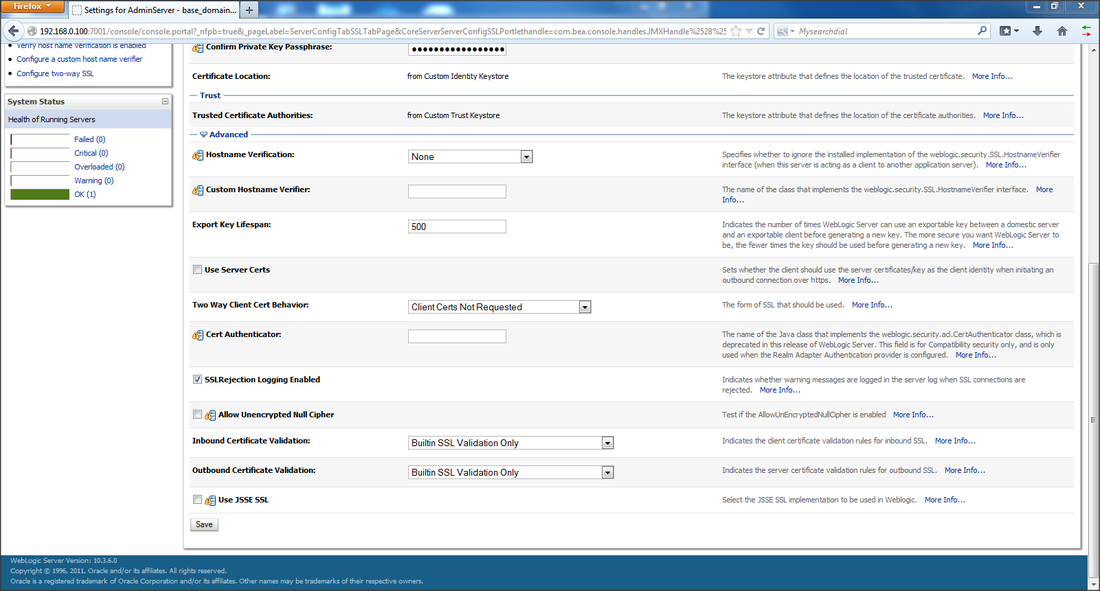
click on the " >Advanced " field under the " SSL " tab :
Set the " Hostname Verification: " to None ( from the drop down menu ).
Note : We need to select the hostname verification as none if the CN of the certificate is not the same as the hostname of the machine where WLS is installed.
Set the " Hostname Verification: " to None ( from the drop down menu ).
Note : We need to select the hostname verification as none if the CN of the certificate is not the same as the hostname of the machine where WLS is installed.
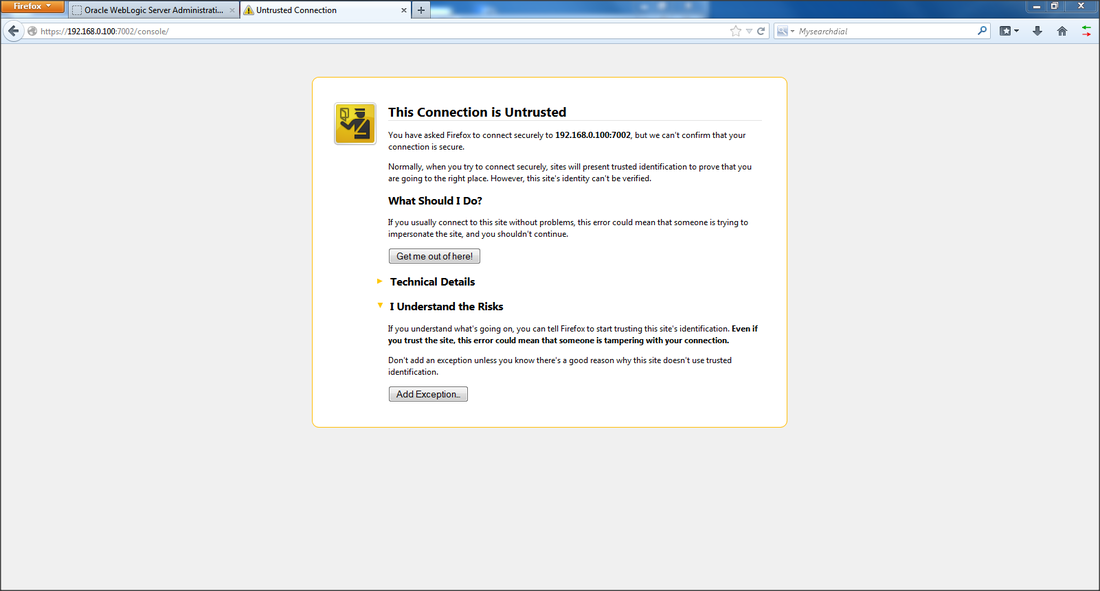
Now access your Weblogic Admin console over https URL :
" https://localhost:7002/console "
You have to add this a Add Exception and then the Weblogic Console will come up.
" https://localhost:7002/console "
You have to add this a Add Exception and then the Weblogic Console will come up.
You can check the Certificate by clicking on the Lock button on the address bar and then check the View Certificate and thus we can see that the Weblogic is using the Self signed Certificate which we have created by using the Keytool Utility.
Now your Webloigc Server is been configured on SSL .
Now your Webloigc Server is been configured on SSL .

